Saddlebag
Marker/Signal Lights
|
Disclaimer
Information has been
provided on these pages in hope that it will be useful.
Each of these pages contains steps followed to complete certain
modifications on my bike.
This is not a shop manual. I am not a mechanic.
I assume no liability is for any damages, direct or otherwise,
resulting from the use of this information.
If you choose to follow the steps on these pages, you do so
AT YOUR OWN RISK. |
|
| After seeing
a few Valks with lights on their saddlebags instead of reflectors, I
have decided to apply this mod to my own Valk Tourer. I wanted these
to operate as running lights, and also as signal lights. |
Note: Click on any image to view the
full size picture.
|
Parts used:
I have chosen to use Red LED Marker
Lights from
J.C Whitney (part number
01ZX4780B) because they are very similar in shape and size to
the OEM reflectors.
To use these LED marker lights as
running and also as turning lights, I have used a "non-powered"
Hoppy 48845 trailer taillight converter. It is inexpensive, very
efficient and easy to find (Wallmart, autopart stores, etc.). I had
tried a more expensive "powered" one, but it didn't function
properly for my application (LED marker lights + Kury mini bullets
mentioned below).
Notes: This Hoppy 48845 has also
permitted me to use Kuryakyn mini bullets at the front and at the
rear of the bike as running/signal lights. For $12.00, IMHO that is
quite a bargain! |
 |
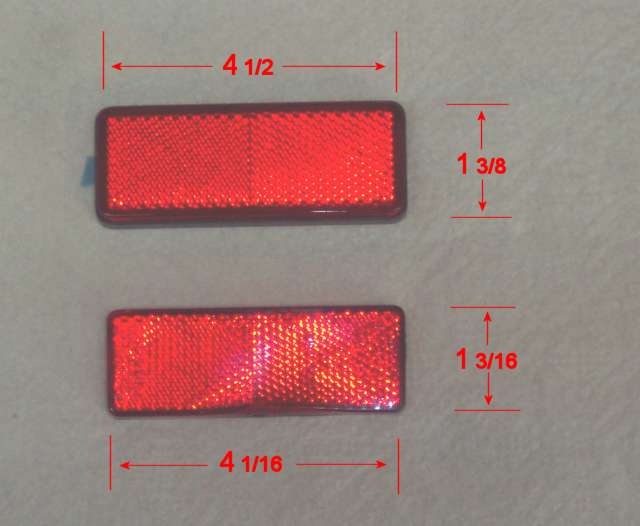
As shown in the pic, the LED marker
lights are slightly larger than the OEM reflectors.
The OEM reflectors measure 1 3/16 X 4 1/16 inches.
On the other hand, the LED marker lights measure 1 3/8 X 4 1/2
inches. In order for the light to fit in the pocket on the
saddlebag, a little (3/16") must be removed to be removed underside
(only part ways). As suggested by SixPack, I have used a utility
knife to trim the bottom edges of the lights.
|
 |
| To fit the
marker lights flush to the saddlebags, two holes must be drilled in
each saddlebag (one for stub and the other for the wires at the back
of each light).
|
 |
|
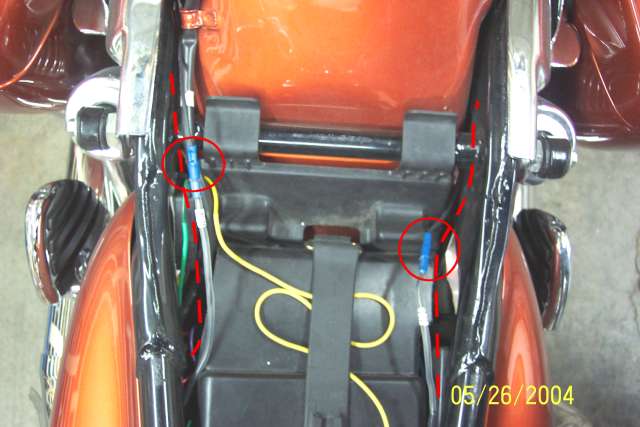
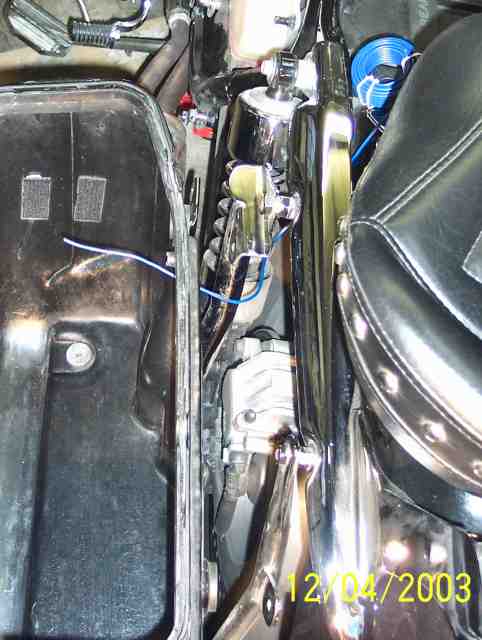
In order to make it possible to remove the saddlebags without
cutting wires, etc., connectors will be used. As shown in the pic
(under seat, top of fender), there is a good gap between the rear
fender and each of the chrome fender supports. That's where the
saddlebag marker wires will be routed. |
 |
|
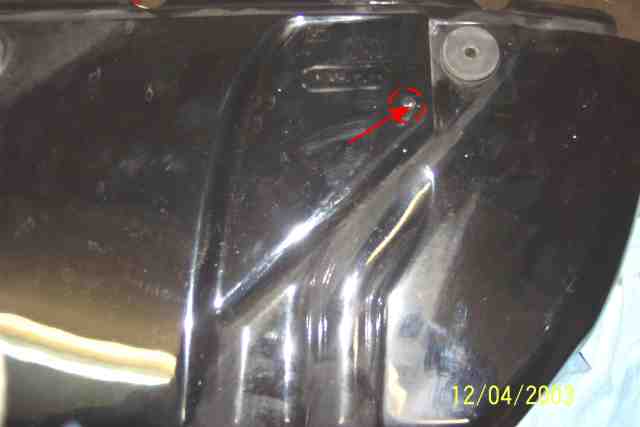
In order for the wires to exit right
under the front saddlebag bracket, holes will need to be drilled
inside each saddlebag in the shown corresponding location. This will
make a nice clean short path for the wires to follow. |
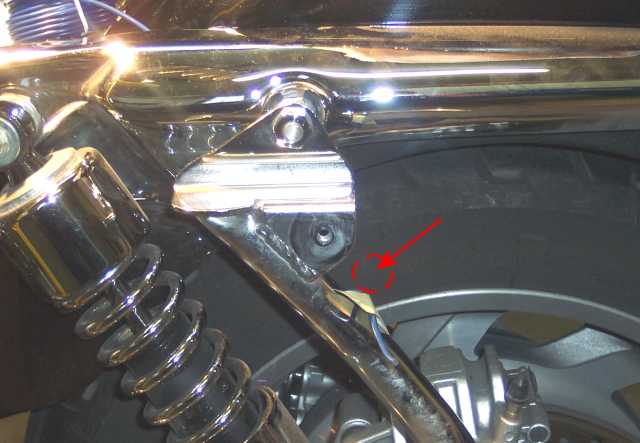 |
The pic shows the location where the
holes must be drilled in each saddlebag (under the front top
saddlebag bracket).
Note: This is a pic of the right (brake side) saddlebag). Others
pics are for the left saddlebag. I know ... I should have been
consistent when taking the pics... |
 |
|
With the saddlebag in place, you can see
(top view) the path that the wire will follow from the saddlebag to
underneath the seat. |
 |
|
With the saddlebag in place, you can see
(rear view) the path that the wire will follow from the saddlebag to
underneath the seat. |
 |
|
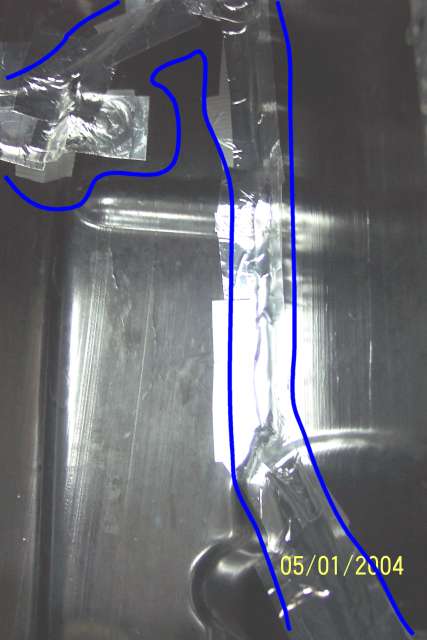
The ground wire (in blue) is fastened to the bottom rear bolt of the
saddlebag. The 12 volt wire (in red) follows the bottom contour of
the bag before moving up to the exit hole (under the front top
saddlebag bracket). |
 |
|
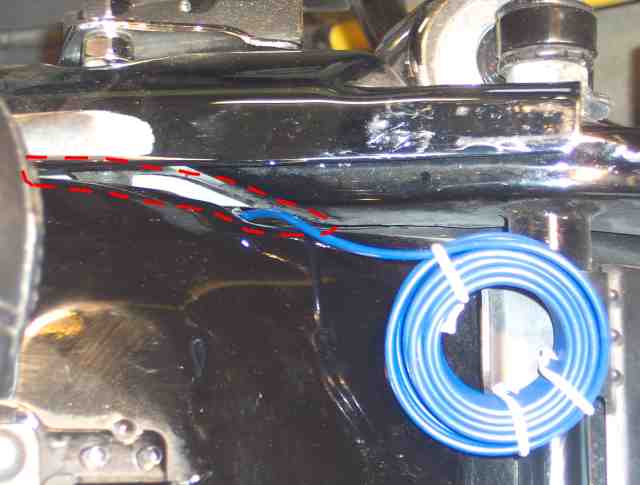
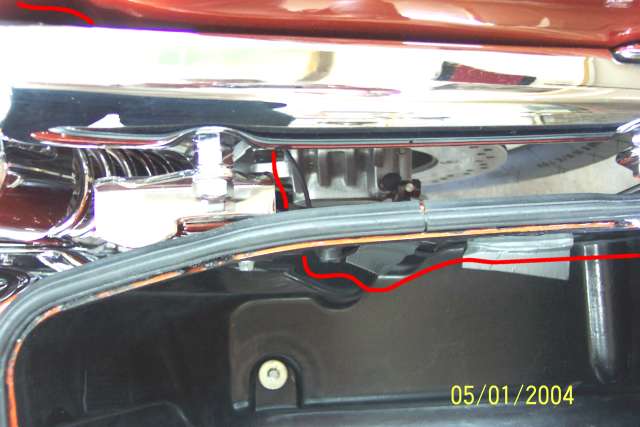
After exiting the saddlebag under the front saddlebag bracket, the
12 volt wire (in red) passes under the chrome fender bracket to go
under the seat. |
 |
|
Aluminum tape is used to protect the wires inside each saddlebag. |
 |
|
The connectors under the seat are highlighted with red circles in
the picture. The path of the wires are traced in red. |
 |
What is a Taillight
Converter?
Some trailers operate with the brake
lights and turn signals on the same wire (using a one-element bulb
on each side). Whenever a vehicle, with separate bulbs for stop and
turn, tows a trailer with lamps that have only one one-element bulb
per side for both stop and turn, a device called a taillight
converter is required.
Since our Valkyries operate with
different elements for stop and turn lights, a taillight converter
could be used to let the saddlebag LEDs function as running lights,
and also as turning lights.
Note: As mentioned on the
Hoppy web
site, the 48845 module can power 2.1 amps. per stop/signal. In
my case it needs to power more than that (1 LED + 2 kury bullets per
side). Two lights (2 bullets or one bullet + the LED) would function
properly, but not all three together. I have therefore used the
converter to activate a relay on each side. Each of these relays
powers three lights on one side (left or right). However that is
another different mod and will be discussed later on when I get a
chance to illustrate this conversion.
|
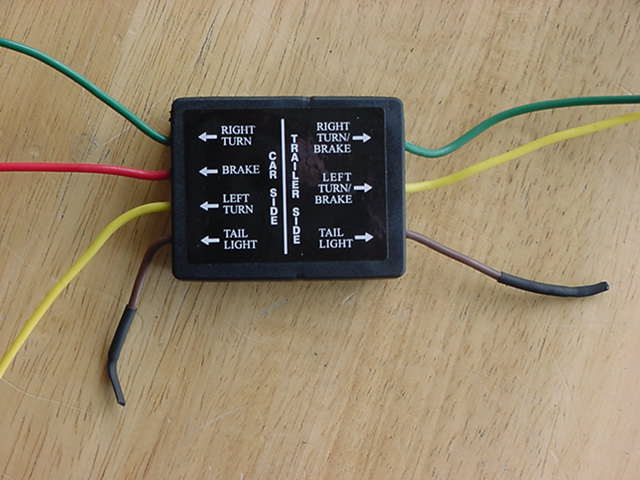
The Hoppy 48845 Taillight Converter
The module has 4 input wires (Right
Turn, Brake, Left Turn, Tail Light {Run}) and 3 output wires, (Right
Turn/Brake, Left turn/Brake, Tail Light {Run}).
The color-coding of the wires on these
modules follows a standard which is: Green-Right, Red-Stop,Yellow-Left,
Brown-Tail.
Set Up
Since we are dealing with Run/Signal
lights only, we will convert this module to be a 3 wire to 2-wire
unit.
The brown wire on the converter is eliminated as shown in the pic
(cut off at each end and then covered with shrink tube).
Splice the Bike Wires
Splice wires from your Valk wherever
you find it most convenient (under the right side cover or in the
rear fender area). I have chosen to place the converter under the
seat and then to splice into the required wires under the right side
cover.
Connections on the Car Side (left
side) of the Module:
From the bike, connect the right turn
signal wire (light blue) to the green wire, the left turn signal
wire (orange) to the yellow wire, and then the taillight wire (brown
or brown/white) to the red Brake wire (yes to the brake light).
Why Use the "Stop Circuit" for the
Running Lights???
When the taillight wire from the bike
is connected to the Brake wire on the module, it powers that circuit
all the time. Both lights on the downstream side (Right Turn/Brake
and Left turn/Brake) will then receive that power (as if the brake
was being used), and be ON at all times.
When a turn signal on the bike is activated, it sends power to the
corresponding wire on the "car side" of the module (green or yellow
wire). The 48845 module will then interrupt power momentarily to the
corresponding wire on the "trailer side" (green or yellow wire).
Thus the signal light will start blinking. |
 |
| |
|
|
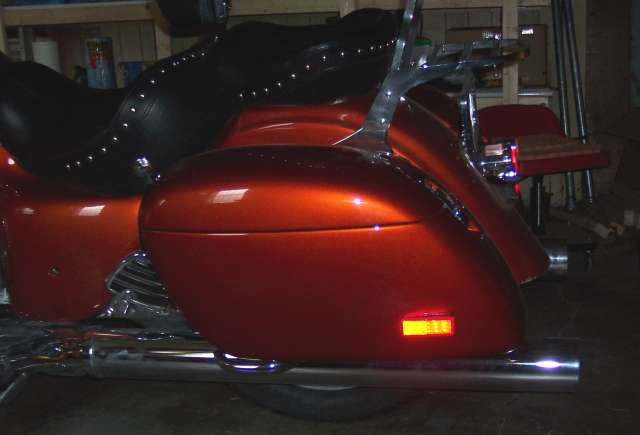
The LED marker lights are quite bright and visible. At night time,
the Valk now appears much larger when seen from the rear (good for
cagers...). Rear/side view. |
 |
|
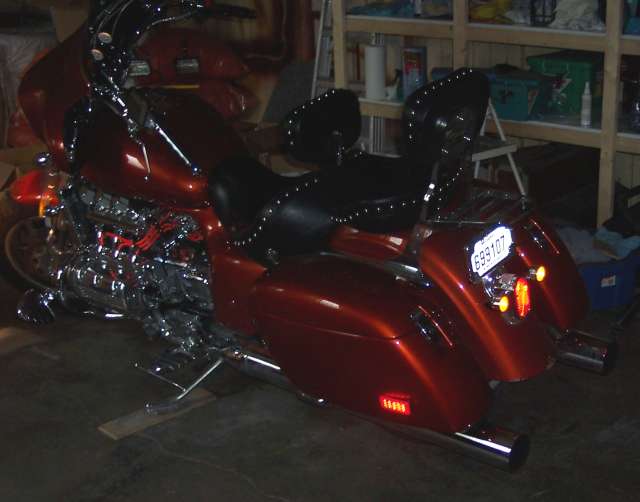
I am quite happy with the results. These do not look like they were
added on as an after thought. 99% of the people (other than Valk
owners) are inclined to think that these are OEM.
Side view. |
 |
Hats off to Master Blaster and to
SixPack for patiently sharing their tips and tricks on installing
saddlebag lights.
Their suggestions and explanations made it much easier for me to do
this mod.
|
 ShopTalk