|
 ShopTalk
|
- Title Page- Interstate Headlight Replacement
- Original Author-
Raymond
-
Because these pages may move to other servers
from time to time, we have put this information on our server for all to
view. If you are the original author, and you have a problem with that,
please contact us and we will remove this page.
|
Valkyrie
Interstate Headlight Bulb Replacement
by Raymond
This page explains how to replace the left headlight
bulb in the Valkyrie Interstate. Right bulb replacement is the same, I just
wanted to clarify these pictures are of the left bulb.
This help page also shows the use of an "adapter ring" for
the use of 9003 automobile headlight bulb.
You will need one (or two if your replacing both bulbs)
stock 45/45 watt Interstate bulb.
Optional bulb, 9003 automotive type bulb with adapter ring. Wattage of your
choice.
Tools
No tools needed for this job but a small flashlight, small hands and good
eyes are optional!!
Process
Simply, all you have to do is unplug the wire connector, pull the boot off,
unclip the bulb and the bulb will fall into your hand. If your like me
though, simple never happens on the first attempt so here are detailed
instructions for this simple process.
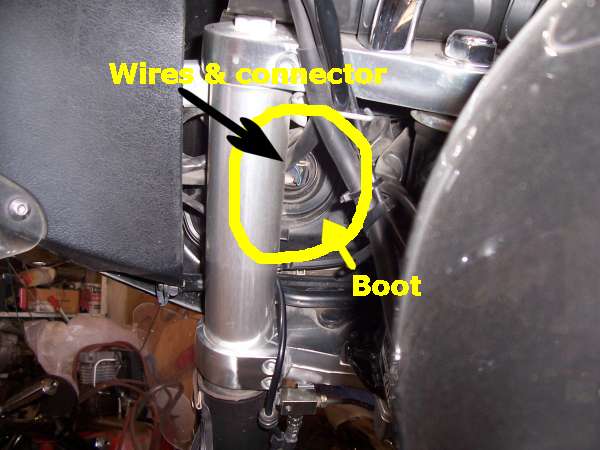
Turn the handle bars towards the right to access the left bulb. Kneeling
beside the bike and looking into the fairing sitting just behind the left
fork you will see a 4 inch diameter round rubber dust cover (boot) with a wire
connector and the bulb wires in the center of the boot. Under that rubber boot
and connected to the wires is the headlight bulb.
The bottom right side of the boot and the wire connector can be seen in this
picture just to the left of the plastic "wire tie".
Reach in and remove the wire connector from the bulb.
Sound simple enough right?
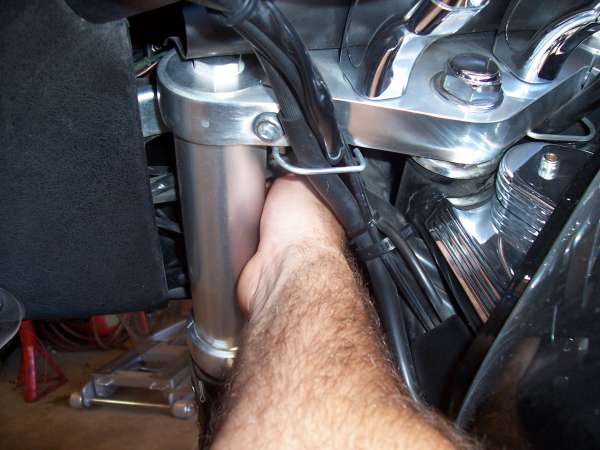
If the bulb has been in the bike for some time it will
probably be a little corroded and hard to remove. Do not to pull on the wires,
pull only on the outside of the connector. Keep working at it, even if it seems
it won't budge you will be able to get it free. Some side to side and top to
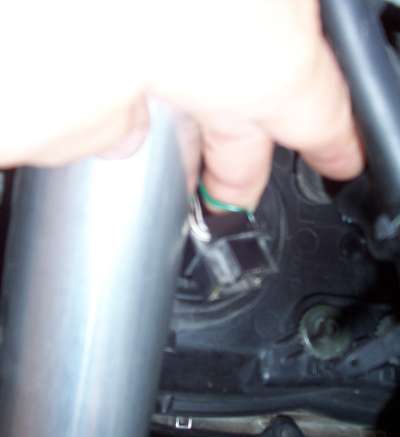
bottom movement helps once you get it started. This (blurry) picture shows the connector
removed.
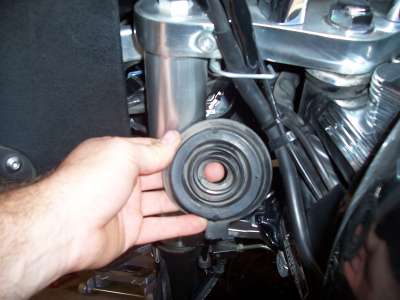
On the bottom of the rubber boot you should see a small tab. Grab the tab,
pull outwards and remove
the rubber boot.
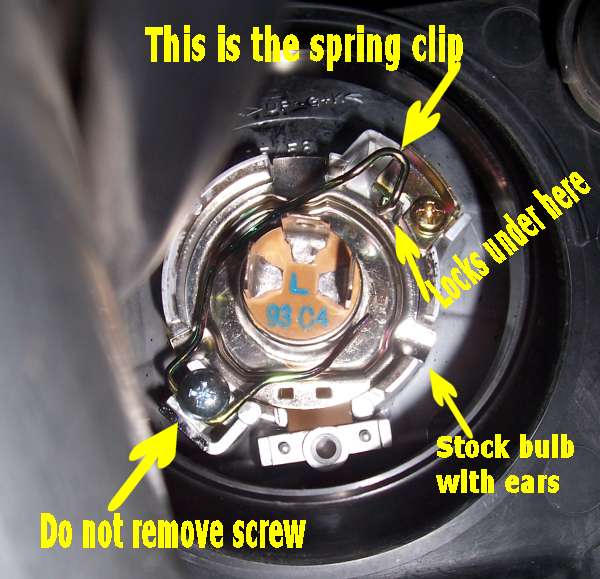
Look inside now and try to get a good mental image of the bulb and the gold
colored spring retainer at this time. You will see that the spring clip simply
hinges at the bottom left side and catches under a bracket on the top right
side. When clamped in place the spring holds down the bulb with a left (long)
and right (short) leg. There is a screw at the bottom left where the springs
"hinges" for bulb removal. DO NOT TOUCH THAT SCREW! Don't loosen it or try to
remove it. It will not help any at all. You will only drop it inside the
headlight bucket assembly and may not be able to retrieve it without taking the
entire fairing off the bike. Like I said, DO NOT TOUCH THAT SCREW! There is also
another screw on the top right, DON'T TOUCH IT EITHER!! This picture shows the
stock Honda bulb with all three alignment tabs in place on the perimeter of the
bulb. The tabs hold the bulb in the proper position in the bulb bucket. Note the
widest tab is at the top of the bulb. Also note how the spring is clipped under
the bracket at the top right.
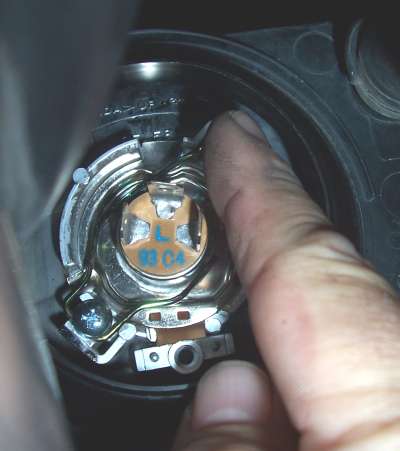
Removing the bulb is very simple, just press down on the top long leg of the
spring and move it to the left just slightly. Release down pressure and the
spring will move out free of the bracket. The spring "hinges" back towards the
fork. It only takes a small amount of movement to accomplish this task. Just use
a finger and slide it left then release. The bulb will be free and may even fall
out of the bulb bucket.
Now that you have the bulb remove you are ready to install the new stock bulb
or a different brighter bulb. I personally like the Sylvania Silverstar 9003
ST/2 bulb. You must cut off the bottom 2 tabs of a 9003 for it to fit in the
Honda bulb socket. Just clip the tabs off even with the bulb diameter with a
pair of tin snips. These bulbs are rated at 60/55, just slightly more wattage
then the stock 45/45 bulb. I have not heard of anyone having any trouble with
melting of plastic parts with these bulbs. I buy these bulbs at the local
Wal-Mart or most any automotive store. They seem to be readily available
everywhere now. They put out a lot more light of a color that satisfies me
enough to pay the much higher price for the bulbs. Others are also using higher
wattage bulbs or different types of the "High output" or "Blue light" bulbs.
Another common bulb is the 9003 "Cool Blue" bulbs also carried by Wal-Mart.
Warning, use higher wattage bulbs at your own discretion. Too high of wattage
may cause plastic parts to melt or wire rating capacities to be exceeded.
Some of our fellow Interstate riders simply cut off the
bottom tabs and use the bulbs without an available adapter ring. This may make
the bulb sit with the front raised up and change the diffusion pattern of the
projected light. Most not using the adapter ring adjust the aim of the light to
compensate for this alignment error. The headlight aim adjustment knob is the
black knob over the bulb (6 inches?) on each side. I personally like the adapter ring that
several motorcycle accessory supplies sell. I'm not sure of the true
manufacturer of this adapter ring but I ordered mine from Electrical Connection.
http://www.electricalconnection.com/non-electrical/h4_shim.htm
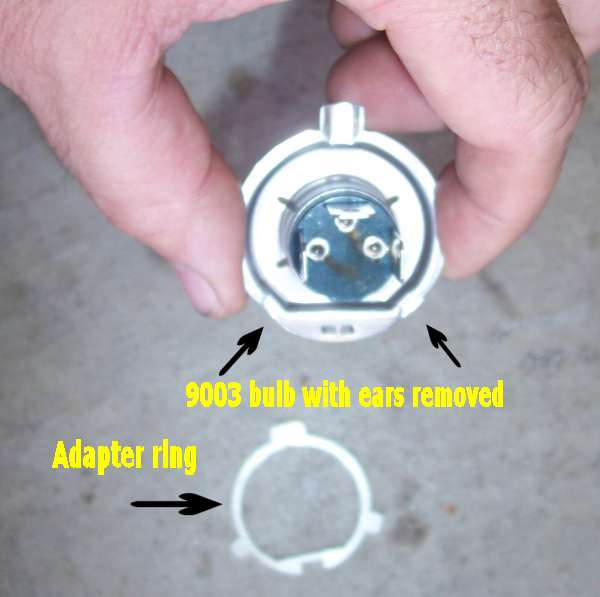
The rings currently are selling for $12.95 plus shipping. The
rings make the 9003 bulbs sit flat and at the correct location for the best
projected light pattern without much aim adjustment. This picture shows the tabs
trimmed off on the Silverstar bulb and the adapter ring.
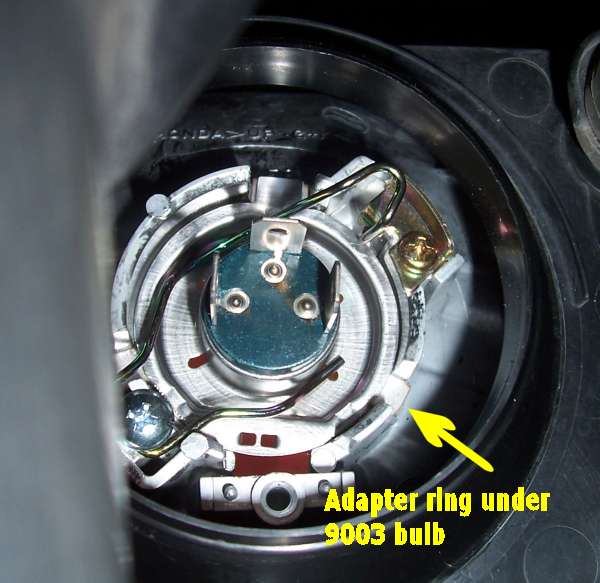
To install the stock bulb just place it inside the bulb bucket and latch the
spring back. If you are using a 9003 bulb with the adapter ring place the ring
around the glass part of the bulb and sit it down on the front metal surface.
Never touch the surface of the bulbs as skin oils will shorrten the bulb life. After you get the bulb (and ring) in the bucket drop the spring back down to
secure it. You may find that the spring seems so be higher then it should be. If
so check and see if you are hitting the top prong of the bulb and work the
spring up a little. It should just press easily down and then with one finger
press and slide right to latch. Be sure all the tabs (and the adapter ring if
used) sit in the gap around the outside of the bulb bucket.
Replace the rubber boot with the tab on the bottom. It should slide over the
outside easily. Reconnect the wiring and pat yourself on the back for a job well
done!
Raymond
ValkyrieRiders.com
Message Board
ShopTalk
Just Pics
Valkyrie Hot Links