Before we get started I think that it's important to note that this article is for informational
purposes only. I'm not a mechanic, but this mod was easy enough for me to pull off with some
help on the welding. If you have serious doubts about your ability to do this mod, then by all
means don't cut into your $1200.00 stock pipes.
There are many variations of the Glass Pack Modification (including those with threaded collars
to remove the packs, etc). This version however, is about as simple as it gets. We didn't have the
need to switch the glass packs out with straight pipes (I've ridden with straight pipes and it's
not for me). Therefore we welded everything up tight and created a "permanent" solution. Nothing
is really permanent, glass packs wear out over time and become louder but when the time comes I'll
just chop it off and redo it. This modification sounds great and adds about 8-10 horsepower.
You can really feel the difference in acceleration!
It does take a little nerve to chop into your $1200.00 stock exhaust so if you can get past that,
and find someone to do a little welding for you, the rest is a piece of cake.
Parts and tools you will need:
- (2) 4" diameter x 36" long
Airflo Truck stacks
- (2) Glass pack mufflers 18" length with 2" inlet & outlet
- (2) 3" to 2-1/2" exhaust reducers (easiest size to find)
- (4) mounting bolts and nuts
- Chop saw w/metal cutting blade
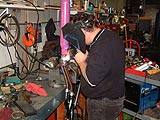
- Wire feed welding rig (what we used)
- The usual tools (sockets, etc.)
The procedure is as follows:
- Remove the exhaust pipes from the bike.
- Remove the rear tips and all heat shields.
- Mark your muffler cans about 2-1/2" back from where the headers come into them
- Gulp, chop the muffler cans off with a chop saw w/metal cutting blade.
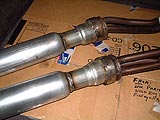
- You will now have headers that go into a 2-1/2" deep by 4" diameter "cup"
for lack of a better term (see photo of doug holding pipe at right).
- Weld the glass packs to the reducers. In my case the inlet tube of the glass pack fit easily
into the small end of the reducer and there was some play. We did a tack weld and then
lined them up straight before finishing up the welds.
- Weld the reducer/glass pack unit into the cups being careful to keep them straight.
everything needs to line up straight in the end for the Stacks to be able to go on.
- After you finish welding, be sure to smooth off the outer surface of the original muffler
cans (the 2-1/2" cup) with a file because that's the part the stacks have to slide over.
the surface needs to be free from burs and high spots.
- Replace the front heat shields that go over the headers.
- Bolt the exhaust back onto the bike.
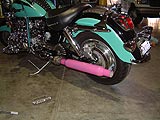
- Apply some anti-seize to the inside of one end of a truck stack and slide it on
over the exhaust unit. You want the stack to but up flush against the front
heat shield that covers the headers.
- Have someone hold the stack up against the mounting bracket on the rear foot peg mount
and at the back of the bike, measure from the top surface of the stack up to the rear fender
strut bolt. Repeat this procedure on the other side. These measurements need to be even on
both sides for the stacks to be parallel with each other.
- If everything looks good and lines up okay, then you're ready to mark the stacks and drill
holes for the mounting bolts.
- Again, have someone hold the stack against the mounting bracket and reach around to the back
side of the bracket to mark the spots for the holes. I used a fine-point permanent marker
- Pull the stacks back off, and drill the holes for the mounting bolts.
- Slide 2 bolts through the inside of the stack and use a small piece of duct tape on the
outside to keep them from falling out.
- Loosen the rear foot peg mounting bracket (makes getting the stack on easier)
- Slide the stack back on and rotate it so the bolts are facing in. Carefully remove the
tape, slide the bolts through the bracket, put on the nuts and tighten everything up.
- Repeat procedure on the other side.
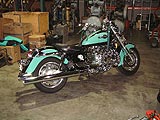
- Fire that bad boy up, and try to get the grin off your face.
